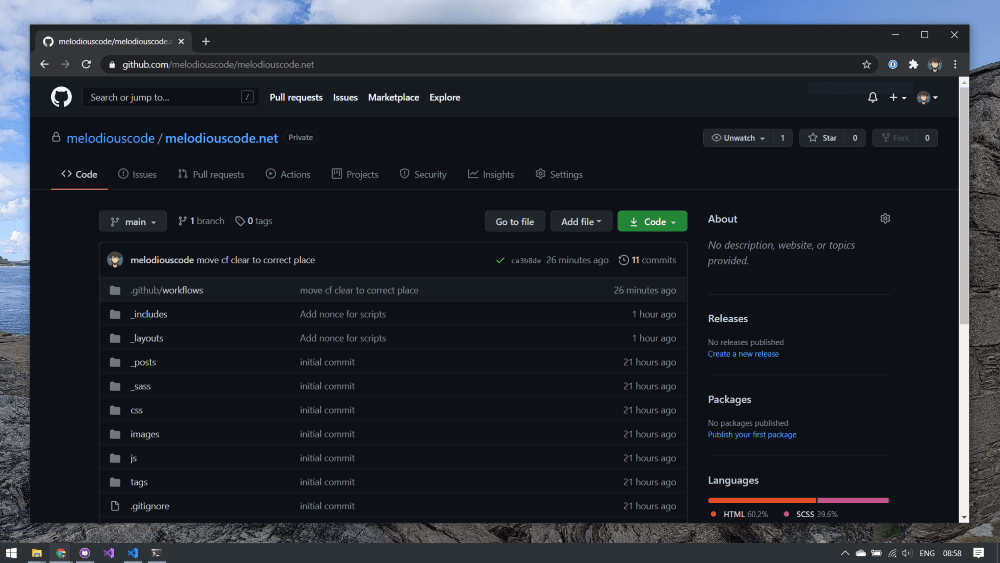
It has been a while since I have written a post on melodiouscode.net; partly because it has been a busy year, but also because I didn’t fancy sorting out some server problems on my digital ocean droplet. Until now melodiouscode.net was hosted on the Ghost CMS Platform within an Ubuntu Droplet on digital ocean’s infrastructure; proxied through the Cloudflare platform for speed and security.
The image that the “Ghost Droplet” was created from contained an old version of the Lets Encrypt agent; the version of the Ghost install was out of date, and the theme I used didn’t support the new version of Ghost.
The Solution
After undertaking some research into alternative solutions, I decided to try out the Jekyll static site generator; why not go back to basics and have an HTML, Javascript, and CSS website?
Before I jump ahead I want to explain a little about what the components of my new Static MelodiousCode are; if you are just here for the instructions on how to host a Jekyll static site with Azure, Cloudflare, and GitHub skip down to the bottom!
What is a Static Site?
Back in the old days (ok, the slightly less recent days) the internet was just a collection of HTML pages; you wrote your webpages and hosted them on your webserver. The server returned the files from its storage drive; they were just basic HTML. In time along came JavaScript, CSS, and eventually dynamically driven pages created as part of the request to the webserver. A static site is what it sounds like; a collection of HTML pages (that may contain Javascript or CSS) that are served on request by a web server. The main benefit being simplicity; your request to this page didn’t require any processing beyond locating the file; nothing was generated or changed, if you refresh the page you will get precisely the same response.
What is Jekyll?
A static site sounds great; simple pages that serve static content to your users. However maintaining all those static pages, copy and pasting templates, updating them with common changes; is time-consuming and prone to error.
Jekyll is a static site generator; it takes the content you write for your site (via markdown files) and merges them into a set of template files to create your static HTML. Via the template files, you can alter the structure or broader details without having to edit each file. Jekyll will regenerate your pages and provide you with a static site to deploy.
What is Azure Static Sites?
Azure Static Sites is a hosting platform that allows you to serve your static content (HTML, Javascript, CSS, Images, etc.) as a website without the need for dealing with hosting infrastructure, databases, or configurations. Azure Static Sites integrates directly with a GitHub repository, and via GitHub Actions (continuous integration) can build your Jekyll site and upload it to Azure on-demand.
Setting up Jekyll, Github, and Azure Static Sites
Setting up Jekyll
The first step is to install the Jekyll toolchain and its dependencies on your local machine (or the environment you wish to use to create your site).
- Install the prerequisites for Jekyll (Ruby)
- Open a command prompt and install Jekyll using the following command
gem install Jekyll bundler
- Switch to a folder where you wish to store your sites configuration files
- Execute the following command to create a new Jekyll blog (change myblog to the name you wish the site to be)
Jekyll new myblog
- Switch to the newly created folder
- Execute the following command to build and serve your new site
bundle exec jekyll serve
- Browse to http://localhost:4000/ (note the http not https).

You now have a tiny webserver running inside your command window hosting a new Jekyll site; visit http://localhost:4000 to view it.
Commit to Git
Setup a Git repository for your site (you can set it to private mode if you wish) and commit your Jekyll files (all of the folder) to the main branch. If you don’t know about Git, then I suggest using the GitHub desktop client; otherwise, go about it in your usual way.
Setting Up Azure Static Sites
The static site resource in Microsoft Azure is designed to integrate directly with a GitHub repository; in fact, it is the only way of uploading your files. If you do not already have an Azure account, you can sign up for one for free; currently, the Static Sites resource is free, so you will not need to provide any payment details.
- Log in to the Azure Portal
- Choose to create a resource, and look for the “Static Web Apps (Preview)” type.
- Enter a name, select a region (pick one close to you if you are unsure).
- Sign in with your GitHub account and set your organisation, repository, and branch name (go for main if you are unsure).
- On the build tab enter “/_site” for the app location; leave the other fields as they are.
- Click Create to create the resource.
Once the resource has finished creating, you will find that a build step has failed in your GitHub Actions (if you don’t get an email about it, go and check). This is because there are a few extra setup steps required in the Action Definition; pull the changes to your repository that Azure has made and open the file in the .github\workflows directory. The file will look something like this; at the time of writing there is a mistake in the created file (some lines are missing). To fix the problem, and allow the build to run, correct the file to look like this.
IMPORTANT: The example file contains values like this “AZURE_STATIC_WEB_APPS_API_TOKEN_WITTY_SKY_0C6D4E003”; you need to ensure you replace them with the keys from your GitHub Secrets that Azure has created for you (which will be the same as the URL name displayed on your Static Sites Overview in the Azure Portal).
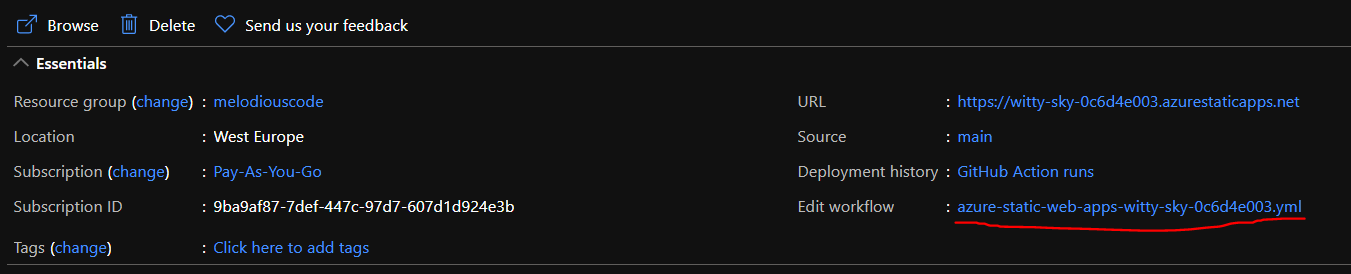
Once you have committed this change you will find that your GitHub Action will run and your new static azure site will serve your site; you can see the URL in the Overview tab on the Azure Portal.
Whats Next?
You have a working site; hosted on an azurestaticsites.net domain, not a perfect domain name but at least it works! You could map your domain to Azure via your domain registrar following the instructions on the Azure Portal, or you could take the next step and set up a security and performance layer for free using Cloudflare.
Proxy through Cloudflare
Adding your domain to Cloudflare is beyond the scope of this article, but it is an easy process to follow in their wizards. Once you have onboarded the domain to Cloudflare, you need to follow the instructions on the custom domains tab of your Azure Resource Dashboard. Some items to note:
- You need to use www.yourdomain.whatever
- You need to disable the proxy setting in Cloudflare DNS until you have performed the Verification Step in Azure.
- I suggest setting up a Page Rule in Cloudflare to redirect the naked domain (yourdomain.whatever) to www.yourdomain.whatever, as at the time of writing Azure Static Sites requires a fully qualified domain.
Update
Thank you to my friend Tony Hillier-Swift of https://www.hillier-swift.co.uk/ for pointing out a few glitches in the instructions for the Jekyll Install! Tony is one of those systems people that all developers have a love-hate relationship with (and I should know, we took our first programming classes together); go check out his blog!
Comments